Estimated reading time 7 minutes, 14 seconds.
“I’ve seen better landings where everyone’s been killed.”
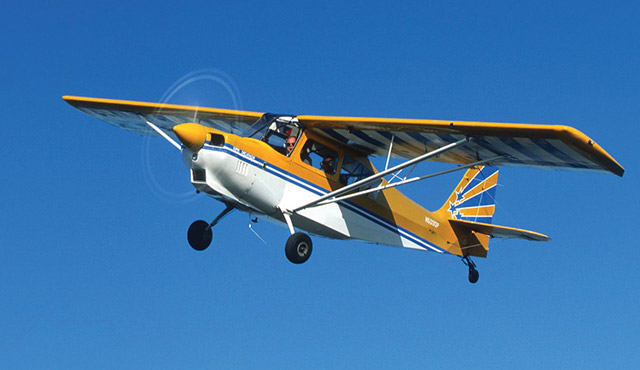
So quipped one of my early flight instructors after I had demonstrated just about every bad trait in the book during circuit work, topping it off with a full stop landing that just didn’t make the grade. It happened while we were shooting a short-field landing exercise at a grass strip. I was dragging in the approach below a normal glidepath, and was low in airspeed to boot. The phrase “mushing in” comes to mind here.
I saw we were going to land short, and added a bit of power while raising the nose to decrease the rate of descent. This normally would have worked fine, except the airspeed had decayed to the point where we were in the region of reversed command — i.e., on the backside of the power curve. Raising the nose just increased our rate of descent, courtesy of more induced drag because of the increasing angle of attack.
The result was that I really plunked it on. Thank goodness it was a grass strip. Not surprisingly, the debrief that day focused on reviewing flight in the region of reversed command.
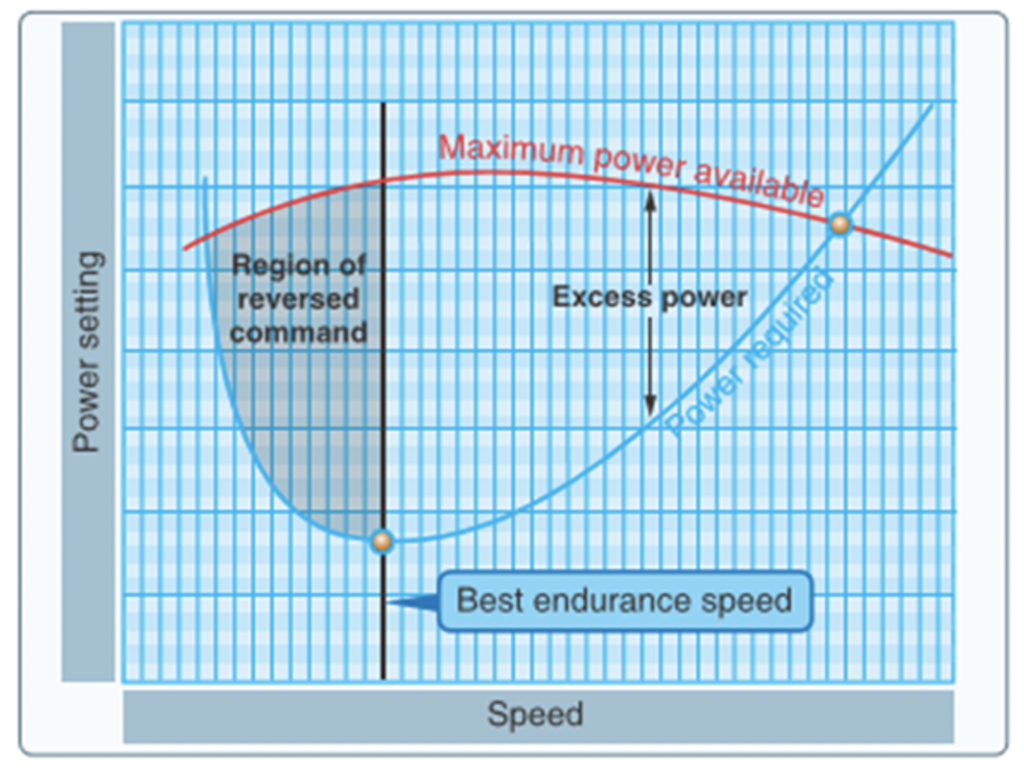
It is a region well named because in it, the slower you go, the more power required to maintain a specific airspeed — as opposed to flight in the region of normal command, where the slower you go, the less power required. Looking at the diagram, you’re behind the power curve once below best endurance speed, which means you’ll be there on every takeoff and landing as you transition through slow flight.
So, how do you develop good habits for dealing with this reversed command scenario? Having a solid understanding of factors affecting aircraft performance is 50 percent of the way home. The other 50 percent is incorporating that knowledge into everyday flying.
The first part can come from diligent ground school study. The second part comes from either gaining practical experience, or in giving thought to where some dicey situations might arise:
A big bounce on landing where you are slow to add power and end up “hanging on the prop” once finally going to full power; reefing the aircraft into the air on takeoff sooner than normal because the end of the runway is coming up fast; attempting to climb out of ground effect during a soft field takeoff without first attaining normal climb attitude and airspeed; dealing with very gusty winds on approach or takeoff; transitioning to a new aircraft and being low on proficiency…
Or, just the basic inattention we are all subject to at times. The aviation gods are always looking for ways to ensure we don’t get too big a head on our flying prowess.
Another excellent way to surf to victory on the power curve is to develop good habits as a solid framework that take a lot of the guesswork out of flying. One of my personal favorites is “snorting,” based on the acronym SNorT, for Setup, Numbers, or Trim. A less-than-perfect landing is usually preceded by a series of inaccuracies that all quickly add up to spoil the party. How was the setup? Did you feel rushed because you had flown the downwind a bit too tight? Were you on the numbers as far as altitude and airspeed go? Last but not least, was the aircraft properly trimmed? If you hammered a landing on or pooched an instrument approach and are looking for guidelines to help you get better, “snorting” is a great way to self-diagnose.
As with anything, practice, practice, practice. One of the best things a pilot can do is train their hands to do the right thing (correct response for power, controls, and switches), while the befuddled mind is screaming, “Why me?!” when things aren’t going smoothly.
Practice slow flight at a safe altitude on a regular basis, or as part of transitioning to a new aircraft, to see how it performs in terms of power, airspeed, and control response. You can get very specific by starting at a comfortable cruise setting and trimming for level flight. Note airspeed and power. In 10-mile-per-hour increments, continue to reduce airspeed, and note power at each point. You will know you are behind the power curve when at a stabilized airspeed you will require more power than the preceding airspeed.
From this point on, more power will be required to maintain the progressively slower airspeeds. For many, it really is surprising to see that flight at 55 mph requires more power than flight at 110 mph. Numbers are aircraft dependent, of course.
When you have finished this exercise, you will know exactly how your airplane — and you — will perform while flying behind the power curve. It is something that will come in very handy, indeed, when you need it most.